
5 Tips To Preserve Your Family History Through Photos
**This is NOT a sponsored post but does contain affiliate links (marked by each product) that earn me a small commission if you purchase through the link.There is no additional cost to you but it does give my small business a tiny boost!
You may have read this title and thought, duh, of course photos can be used to preserve family history! But although it may seem obvious, using photos to preserve and document family history goes well beyond just taking the photo or keeping grandma’s photos in a box in your basement. October is Family History month, so here are five tips to help you document and preserve your family history.
Tip 1: sit down with people with knowledge
If this seems obvious, it’s because it is. You probably already know who you need to talk to. But have you done it? Have you actually taken the time to sit, absorb and document? I can’t stress how important this is, especially with those who are advancing in age. You will hear stories you’ve never heard before, or details that may have before seemed insignificant but now matter. Make it a priority, don’t wait. If you don’t see these people regularly, think about the holidays coming up later this year and set aside some time to have these converations. While your at it, use your phone to record the stories.
Tip 2: name the faces first
If you have any photographs with people you cannot identify, bring them out while talking to your family members. Even if you think you know everything about the share it anyway - there may be details that emerge in the course of your conversation that you have never heard before. Write down the names and the spellings of everyone in the photo. This is generally the most important piece of information that you will gather. In addition to the names, identify the relationships. But don’t write down “grandma’s sister”. Someone else looking at that photo may not know who “grandma” is. Write down the actual names and maiden names if applicable.
Tip 3: write on the back of the photo the safe way
Do not just grab the nearest ball point pen to write on the backs of your photos. If you stack those photos before the ink dries, you will now have ink over the faces of the photo underneath. I have seen that over and over again when scanning photos and there’s not a lot that can be done to remove it once it is there. Instead use an archival safe pen or a soft pencil. I use the these Stabilo Pencils (affiliate link). Do not use sticky notes as the glue might stick too much and rip the photo or conversely the note might fall off. Do not use paper clips to attach notes - they may rip the photos.
Tip 4: use facial recognition
If your photos are digital, or if you scan your photos, facial recognition can be an amazing tool. Most photo organizing software now has facial recognition, including Apple Photos, Mylio, FOREVER, Google Photos, Amazon Photos, and Adobe Lightroom Classic. After you have identified someone in the old photos, name that person in your software and let the software find more images with that face. This makes it infinitely easier to organize your family via photos, as well as to sort and find grandparents, great grandparents, and more. The software can make mistakes sometimes, but it can also identify people that are younger or older that may in fact be that same person. You can then take that information and confirm. One of the coolest things about using facial recognition is that you can then filter by that person and see all of the photos you have of them together on the screen.
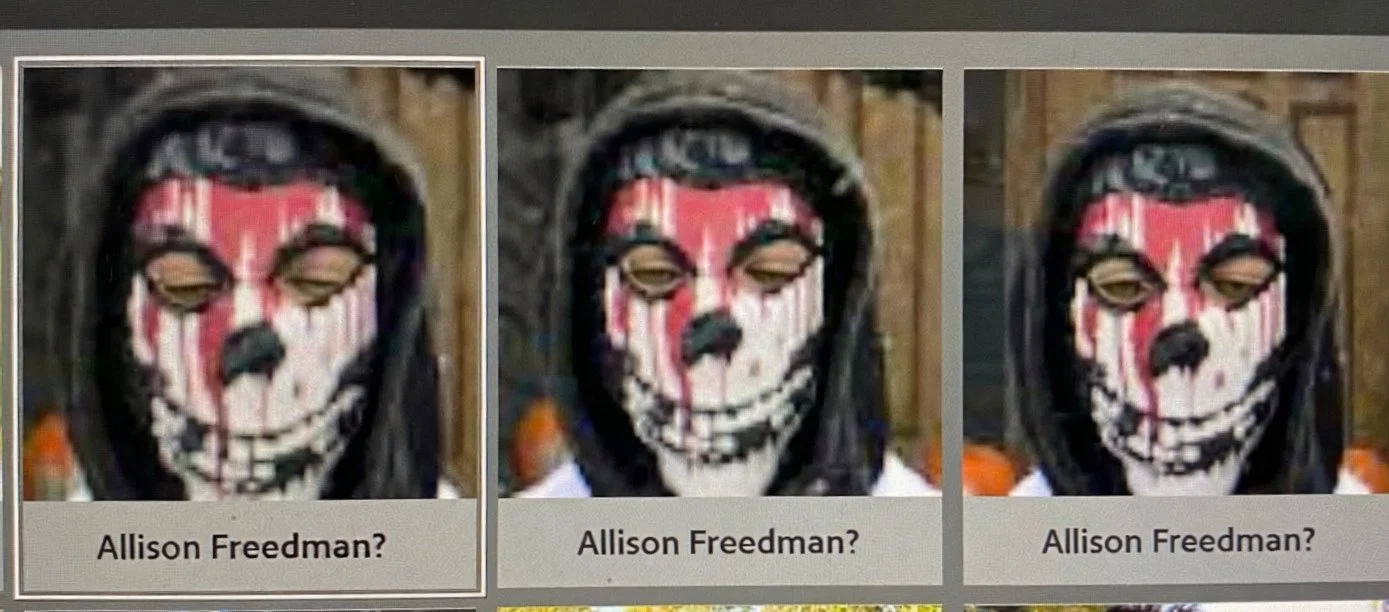
While it can be a great tool, facial recognition does not always act as expected…
Tip 5: use metadata to identify the where and when
Take advantage of your photo organizing software and add as much information as you know into the digital file of the photo. Just like we used to write on the backs of photos, you can now bake that information into the digital photo. Adjust the date field to match the actual date of the photo, add a keyword for the face (some software, like Adobe Lightroom Classic, does this automatically). Add any story about the photo to the caption field. Do you know where the photo was taken? Add the gps or add it to the description. Often this can be done in batch. I find adding keywords and captions much easier and more useful than trying to add all of this information into a file name. If you are scanning your photos and don’t have the time to add all this information, then scan the backs of the photos to preserve it that way and come back to it later.
Resources
There are so many resources to help you identify and document your family history. Here are a few of my favorites.
Family Search and Ancestry.com: genealogical research sites. Family Search is free.
National Genealogical Society: lots of free resources here.
Remento (affiliate link): I used this with my dad to gather his stories and it was so much fun. Once a week Remento sent him a question, he clicked a button to video record his answer. Now we have a beautiful book full of his stories. It was simple to use and took the onus and effort off of both of us to sit down and do it.There were lots of things I didn’t know, and many stories my kids had never heard.
Inside Photo Organizing podcast: we have several podcasts that are relevant to this topic, including
Angie Minor on Geneaology, Season 3 Episode 29. We discuss file naming conventions, what information we need to keep, resources for genealogy research and so much more.
Sky Bergman, Season 3 Episode 19. Sky Bergman is the director of the insightful and captivating documentary Lives Well Lived. We discuss the why behind her project, her approach to storytelling, and tips for how to gather stories from your loved ones - strategies for both DIYs and pros.
Ana Carvajal on metadata, Season 4 Episode 32. We discuss what it is and why it is the true powerhouse of any organized photo library. Ana Carvajal from Posterity Pro shares her secrets and we all discovered different ways and strategies to add metadata to your photos. We all do it differently, so you can listen, learn, and figure out what will work for you.